"Hello World"
Tutorial
Every programmer starts with the classic "Hello World" example, and we're going to do the same.
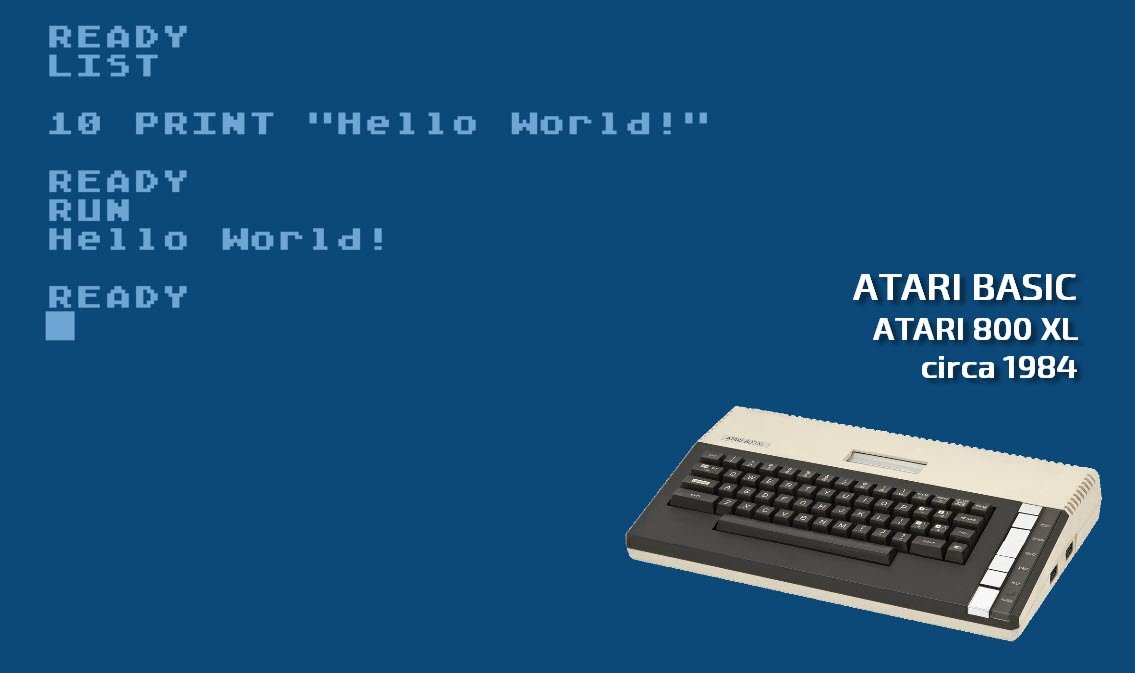
It won't be quite as simple as it was on Atari BASIC, circa 1984, running on an Atari 800 XL — an 8-bit computer with only 64kB of RAM:
10 PRINT "Hello World!"
RUN
Hello World
Building a web application today is a bit more involved.
In this tutorial you'll build a fully functional module in Epesi — something you can package, install, uninstall, translate into other languages, and share with other users through GitHub or the Epesi Store. You can distribute it for free or sell it: it's your own, custom version of Epesi BIM with your own modules included, all under the extremely permissive MIT license. That's the freedom of FOSS.
Epesi PHP Framework was designed to make module creation as simple as possible. It's the low-level framework used to build Epesi Business Information Manager, or Epesi BIM for short. It favors an agile approach: rapid prototyping with low-code and no-code tools, for building database-driven Single Page Applications (SPAs) like CRM or ERP systems — cloud-native, since everything is built for the web.
Tech tip: basic knowledge of HTML and PHP is required. Familiarity with SQL and CSS helps. This tutorial is written for absolute beginners — you'll be guided step by step. It's easy. It's Epesi.
Every module needs three PHP files
The minimum for a functional Epesi module is three simple PHP files. The main module file is named Modulename_0.php, where 0 is the module's version:
1. Modulename_0.php — the main file of every module 2. ModulenameCommon_0.php — shared functions other modules can call 3. ModulenameInstall.php — the installation routine
All of a module's files live in a single directory named after the module, in CamelCase, ideally under the Custom directory:
./epesi/modules/CustomTech tip: if you don't already have a
Customfolder, create one. Use CamelCase for your files and folders.
See Creating Modules for more detail.
Since our module is called "Hello World" and lives in our own custom modules directory, its path is:
./epesi/modules/Custom/HelloWorld/Create these PHP files now. The end result should look like this:
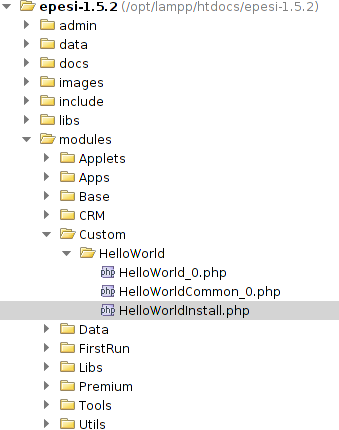
HelloWorld_0.php
This is the main file of the module. It defines the class responsible for the module's main view.
<?php
defined("_VALID_ACCESS") || die('Direct access forbidden'); // security feature

// notice how the class name mirrors its path
// use CamelCase with underscores for readability
class Custom_HelloWorld extends Module {
    // main view of the module
    public function body() {
        print('Hello World!');
    }
}
This is the bare minimum required. For the class to be treated as a module, it must extend the Module class. The body() method is where you put the content to be displayed.
The output of this module is:
Hello World!HelloWorldInstall.php
Every module needs an installation class so it can be installed.
<?php
defined("_VALID_ACCESS") || die('Direct access forbidden');

class Custom_HelloWorldInstall extends ModuleInstall {

    public function install() {
        // installation process for the module goes here
        return true; // return true on success, false on failure
    }

    public function uninstall() {
        // uninstallation process for the module goes here
        return true; // return true on success, false on failure
    }

    public function info() {
        // basic information about the module, shown in Epesi's Main Setup
        return array('Author' => 'Place your name here',
                      'License' => '<Place type of the license here>',
                      'Description' => '<Place description here>');
    }

    public function simple_setup() {
        // controls whether this module is visible in Main Setup's simple view
        return array('package' => __('HelloWorld'), 'version' => '0.1');
        // the module will now show up as "HelloWorld" in simple view
    }

    public function requires($v) {
        // list of modules and versions this module requires
        return array();
    }

    public function version() {
        // the module's version name
        return array('0.1');
    }
}
Our installation class, Custom_HelloWorldInstall, extends ModuleInstall. There are many more parameters and options available here, but this basic minimum is enough for now.
HelloWorldCommon_0.php
This file holds functions related to the module that other code might call from outside the module — for example, to add the module's entry to the main menu.
<?php
defined("_VALID_ACCESS") || die('Direct access forbidden');

class Custom_HelloWorldCommon extends ModuleCommon {
    public static function menu() {
        return array(__('Module') => array('__submenu__' => 1, __('Hello World') => array()));
        // shows up as Module -> Hello World in the main menu
    }
}
Module installation
Note: the Administrator Panel and Modules Administration & Store screenshots below are current (AdminLTE theme, August 2026). The remaining screenshots in this section — showing this specific Hello World module mid-install — still show the old UI, since they depend on actually having built the module from this tutorial, which isn't the case on the reference instance used for this screenshot pass.
Once all three files exist, install the module.
Open the administrator panel:
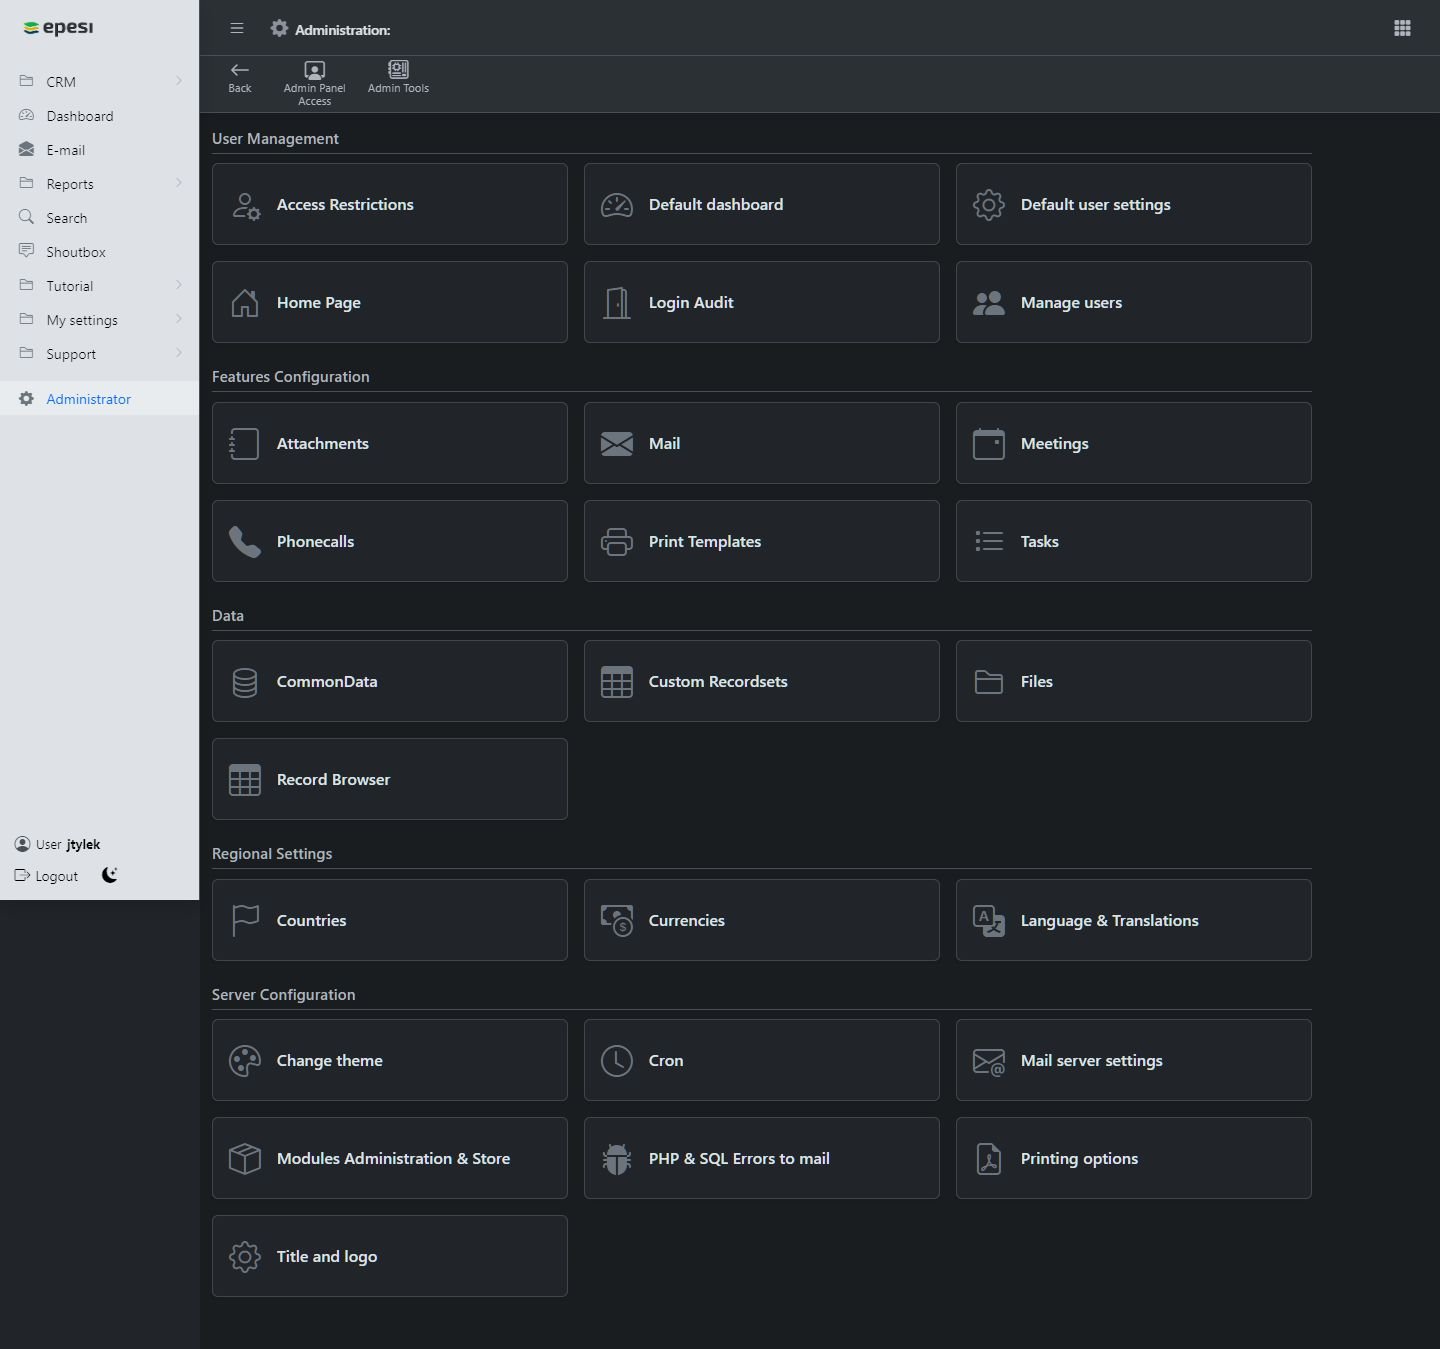
Under the "Server configuration" tab, click "Modules administration & store".
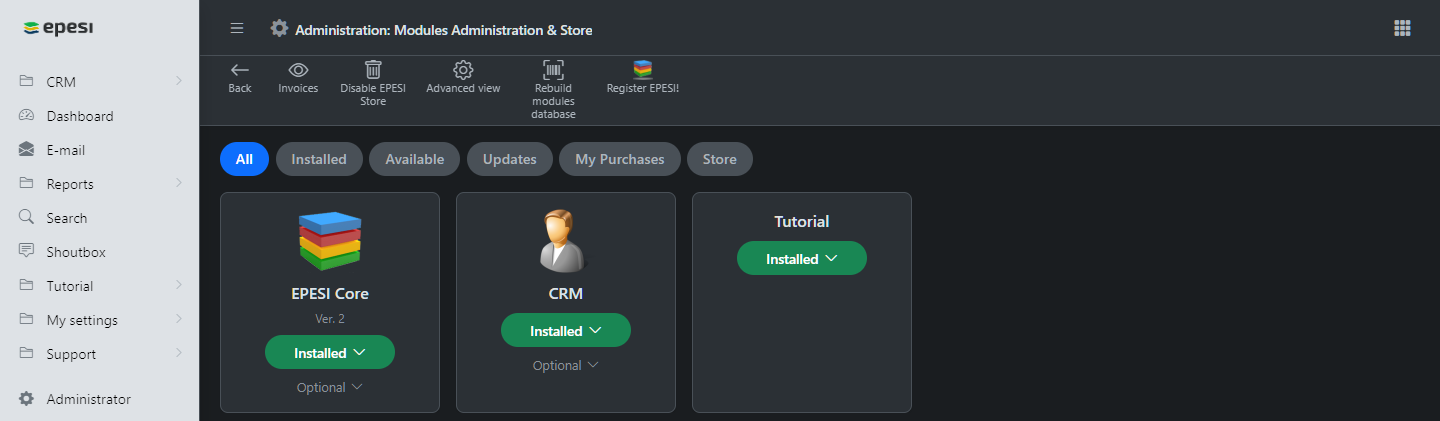
Click Rebuild modules database in the action bar to scan the modules directory for changes and detect your newly created "Hello World" module.
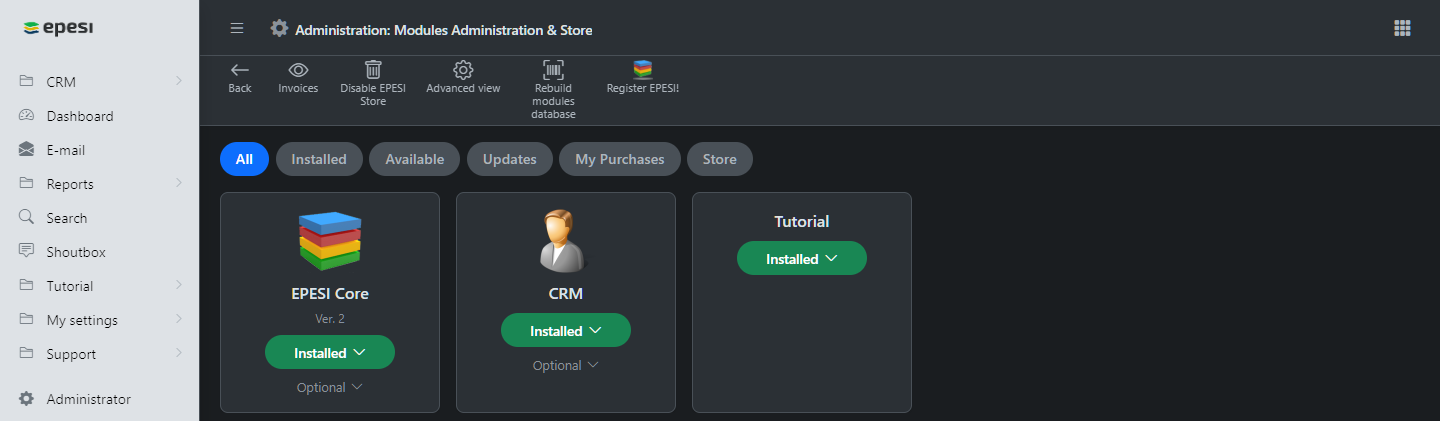
A dialog box will warn that scanning for new modules may take several minutes. Click OK.
After a while, your module will be ready for installation under the "All" tab.
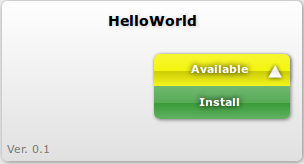
Click Available → Install to install your module.
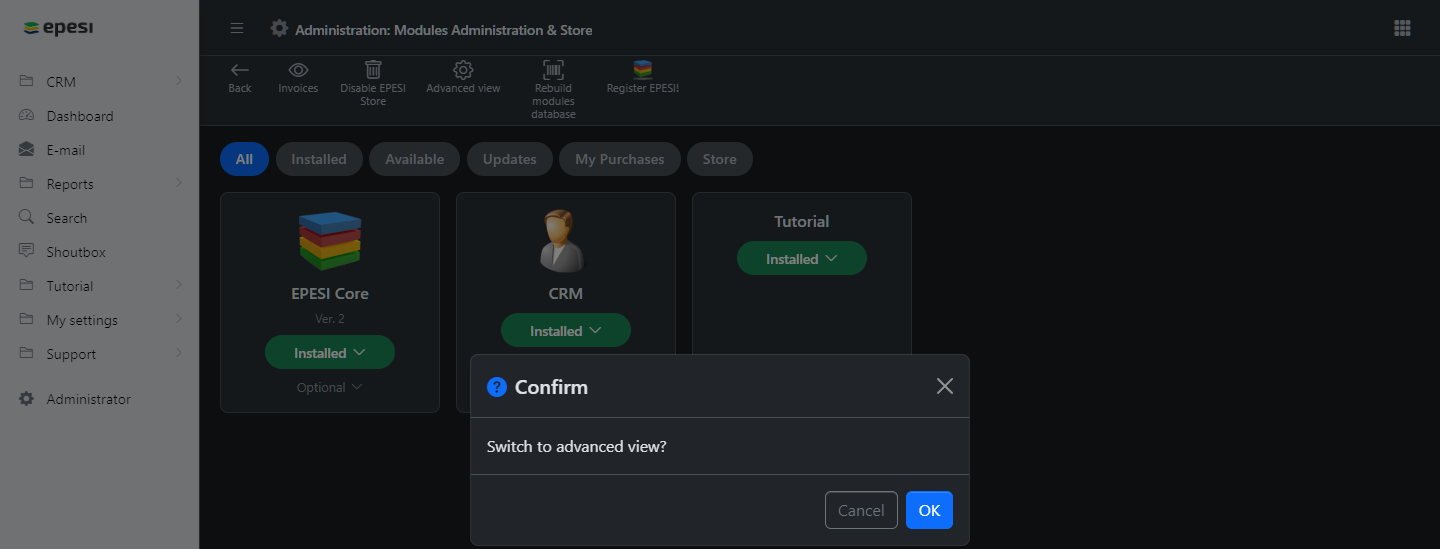
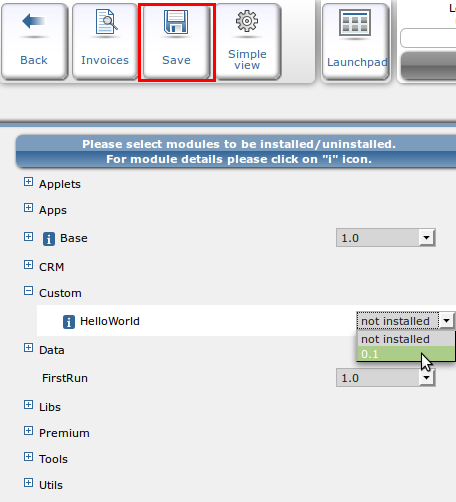
You can also install it from the advanced view, by clicking Advanced view in the top menu.
Change your module from "not installed" to "0.1" in the select menu, then click save in the upper tab menu, as shown below.
A dialog box will confirm that the package has been installed. Refresh Epesi by reloading the page (Ctrl+R or F5).
You should now be able to reach your module from the menu, under Module → Hello World.
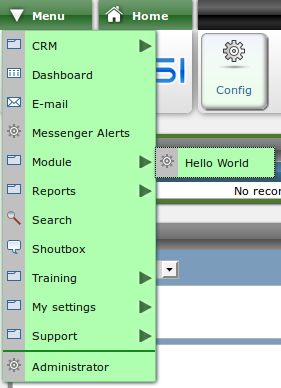
If everything went right, the page will print "Hello World!" at the top center:
Hello World!You just created your first module in Epesi.
Congratulations!
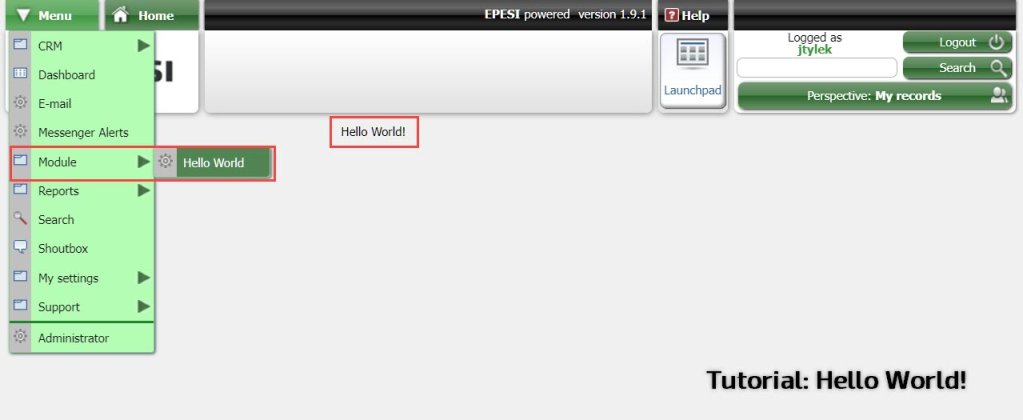 Screenshot of Epesi BIM running a custom "Hello World!" module.